Basic Product Photography
Who Is This Page For?
Firstly, who isn't this page for? It's certainly not for professional photographers or even for those amateurs who already have a decent understanding of lighting and the fundamentals of exposure.
Not so many years ago, product photography was only required by professional publications and it was carried out by specialist professional photographers. Nowadays, it is very different. Everyone has a digital camera or smartphone and we all do our own photography.
The Internet has given us all many more opportunities to do business and make some money on-line, and thus lots of people have set up small businesses trying to sell products on websites such as Etsy, eBay, Shopify, Craigslist, Kaidee, etc etc. On-line selling is huge and very, very competitive.
The extremely competitive nature of on-line commerce means that sellers must always try to get an edge over other sellers selling similar products and when trying to sell on-line nothing is more important than having good quality product photos.
If two sellers are trying to sell the same product at the same price but one seller's product photos are a lot better, buyers will most likely choose to buy from the seller with better quality images.
This page is intended for people trying to sell products on-line who have no knowledge of photography, but who would like to take better product photos.
Equipment
It's light that counts. Not equipment.
When taking photos of any subject, all the camera does is to record the light that is reflected from the subject. A few years ago the image was recorded on film, but nowadays most people use digital cameras which record images on an electronic sensor. If there is no light, that is, complete darkness, no image will be recorded.
It follows, then, that the quality of the image depends very much on the quality of the light reflected from the subject. If you spend a little time and effort getting the lighting right you can get great photos from the most basic digital camera or smartphone.
The key point I am making is that you don't need to spend a fortune on camera bodies, lenses, tripods or lighting equipment. The camera you already own is most likely up to the job and, if not, something suitable can be obtained quite cheaply. A couple of cheap desk lamps and pieces of cloth may be all you need to buy, or possibly you will need will be things you already have.
If you get the lighting right images from a smartphone will look great. If the lighting is horrible, even images taken on a Canon or Nikon flagship professional camera won't save the shot.
Basics
When taking a photo most people will use a single light source, and by using this term I don't mean anything technical. That big yellow ball of fire in the sky is the most common light source for taking photographs. The other common light comes into play when you turn on your camera flash.
The problem with a single light source is that it tends to be quite harsh. This harshness can cause unwanted elements in your photos such as glare on the subject and shadows behind the subject. All we really want to do is to even out and diffuse the lighting so it is less harsh and that way we avoid glare and shadows.
A Simple Fix
The best way to avoid the problems with a single light source is to have a second light source that will cancel out shadows made by the first light source.
When I use the term light source, don't assume that I mean some kind of expensive lighting device that you will have to rush out and buy.
The sun is the biggest and most common light source, and it is completely free to use. You can use sunlight as your primary light source and for your second light source you don't need to use anything more expensive or complicated than a sheet of white A4 paper to reflect light back on to your subject.
I said above that equipment need not be important and that it isn't necessary to spend lots of money, and this is just one example.
Diffusing Light
All it takes to diffuse light is to place some kind of diffusing material between the subject and the light source. You can buy commercial light tents for this purposes, but they are quite expensive.
A piece of white cloth suspended on a piece of string will do basically the same thing and it will be a lot cheaper. However, despite being cheap this method isn't very flexible.
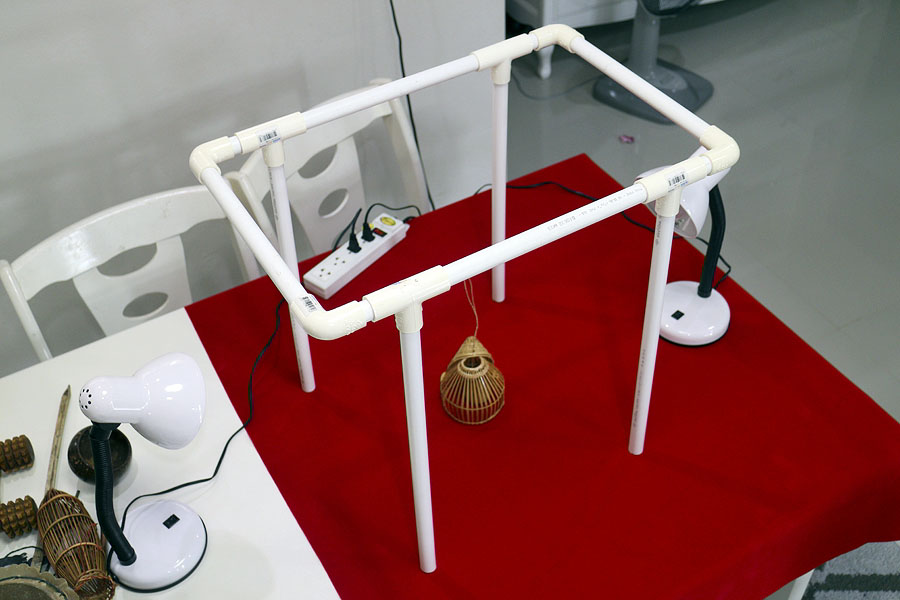
PVC tubing is cheap and I cut some up at various lengths. Using 90° joints it allows me to easily construct a framwork for supporting white cloth. I don't glue the pieces together and this gives me the flexibility to change the shape or size of the frame very easily.
Don't worry how much of a mess the structure looks because it will not appear in your photos. All you need to worry about is getting the light on your subject even and diffused.
Diffusing material blocks light and reflected light from the sun isn't normally a bright enough light source. When using such a light tent I use two artificial light sources. These are just cheap desk lamps with LED bulbs. LED bulbs give out a very natural light, they stay cool, use very electricity and last for several years. The whole set up is cheap and these items are available from all home improvement stores.
Just make sure that you buy cool daylight LED bulbs and not bulbs that give out a warm light. You need to use more than one light source to prevent unwanted shadows, as described above. Two is the minimum, but you can use more.
My wife wanted to sell some items on-line and I set up a very simple light tent so that she could do the photography herself.

Simple light tent
Here's the frame without any cloth.

Simple light tent
Flash
The method I described above uses two LED light sources that are switched on all the time, that is, continuous lighting. It would also be possible to use flash lighting, in which your lighting sources only fire at the time you take the photo. I would not recommend this method for basic product photography.
There are two problems with the built-in flash that your camera or smartphone has. Firstly, it is a single source and, as we have seen, that is not good. Secondly, it is on the same axis as the lens and that tends to result in harsh light.
These problems can be overcome by investing in multiple off camera flashes, but that starts to get quite expensive. Also, with continuous lighting you can observe how your lighting looks very easily before you take the photo. With flash photography you don't know how effective the lighting is until after taking the photo.
As this guide is aimed at beginners with a very basic knowledge of photography I would advise against using flash photography. Just use natural sunlight, a couple of very basic artificial continuous light sources, and keep everything as simple as possible.
Camera Settings
Initially, just leave your camera or smartphone on the basic settings and look at your results. If the end results look pleasing, don't bother changing anything. My wife loves to take photos with her iPhone, but I know that she doesn't have a clue about changing exposure settings, neither does she know how different exposure settings affect her photos.
Most of the time this doesn't matter. Her photos look fine without knowing anything about these things and I expect that is the case for a lot of people these days who have never owned old SLR camera and who never learned about exposure.
If the end result isn't pleasing for some reason and you have the ability on your camera or smartphone to change the exposure settings, the information in the following section may help.
Exposure For Absolute Beginners
The amount of light that falls on a camera sensor (film in the old days) needs to be just right otherwise the image will be under-exposed (very dark) or over-exposed (very light).
This amount of light is controlled by two things - the amount of time the shutter remains open (shutter speed) and the size of the opening in the lens that lets light through (aperture).
It also depends on how sensitive to light the sensor or film is. In the old film days, rolls of film were bought based on their sensitivity and this couldn't be changed mid-roll. With digital cameras we can change the sensitivity of the sensor at will using the ISO setting.
A higher value ISO setting makes the sensor more sensitive so we can take photos is darker light, but too high a setting will result in a grainy look to the images which is referred to as noise.
Different shutter speeds are used to freeze action and with fast moving subjects we need high shutter speeds. Shutter speeds can be as fast as 1/8000 of a second on many cameras and as slow as we want. On some cameras there is a mechanism to keep the shutter open indefinitely. Product photography involves photographing static images and therefore shutter speed isn't important.
Apaerture size has an effect on depth of field. When we focus on a specific point, the points in front of and behind the focus point that remain in focus determine the depth of field. Sometimes it is desirable to have a narrow depth of field and sometimes a deep one.
Different combinations of ISO, shutter speed and aperture will give perfectly good exposures (not too bright, not too dark) but the effect will be different. It's up to you to decide what you want.
If your photos are too grainy you can lower the ISO setting. Nowadays, with most camera you should be able to lower the setting to 400 or 800 and noise should be quite low. If you still have noise, lower it to 200 or 100.
If your depth of field is too narrow, that is, if only a single part of the subject is in focus but the rest of the subject isn't, try changing the aperture setting. A smaller physical aperture setting, which is a higher numerical aperture setting, will give you a deeper depth of field.
For example, f/1.8 aperture setting lets a lot of light through the lens and the depth of field is very narrow. An aperture setting of f/22 lets a little light though the lens and the depth of field is a lot deeper.
Bear in mind, that if you decrease the ISO sensitivity to remove noise or if you change the aperture setting to increase the depth of field, you will need to use a slower shutter speed.
If you are hand-holding your camera you should be OK with a shutter speed as slow as 1/60 of a second. If the shutter speed is slower that that you may start to get blurry images because the camera moves ever so slightly when the shutter is open. If your camera, smartphone or lens has an image stabilisation system then this shouldn't be a problem.
If, in order to get the desired result, you have to use a very slow shutter speed consider investing in a small tripod on which to mount the camera. If the camera is supported it will not shake when the shutter is open and this will allow you to use very slow shutter speeds.
Backgrounds
Avoid busy backgrounds, which will distract the viewer from the subject and look messy. Don't use background materials with patterns or pictures and don't take photos of subjects with a load of junk in the background.
If you don't want any kind of a background use a white background and it will be easier to remove the background with Photoshop later. It is quite easy to use Photoshop's Quick Selection Tool to isolate the the subject and have a perfectly white background.
Depending on the type of subject, you a coloured background that will contrast or complement your subject to show it at its best. I normally just use coloured cloth, which is fairly cheap.

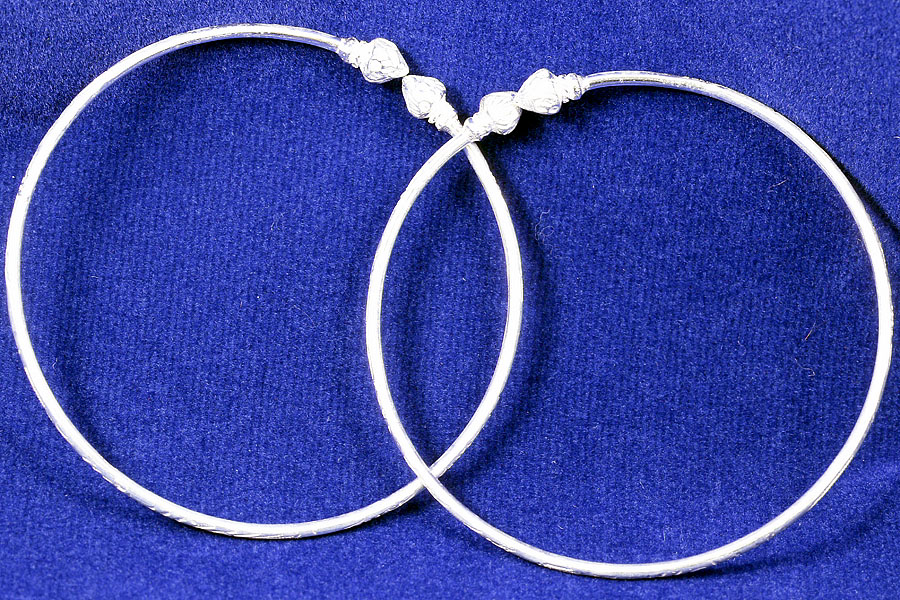
Blue background

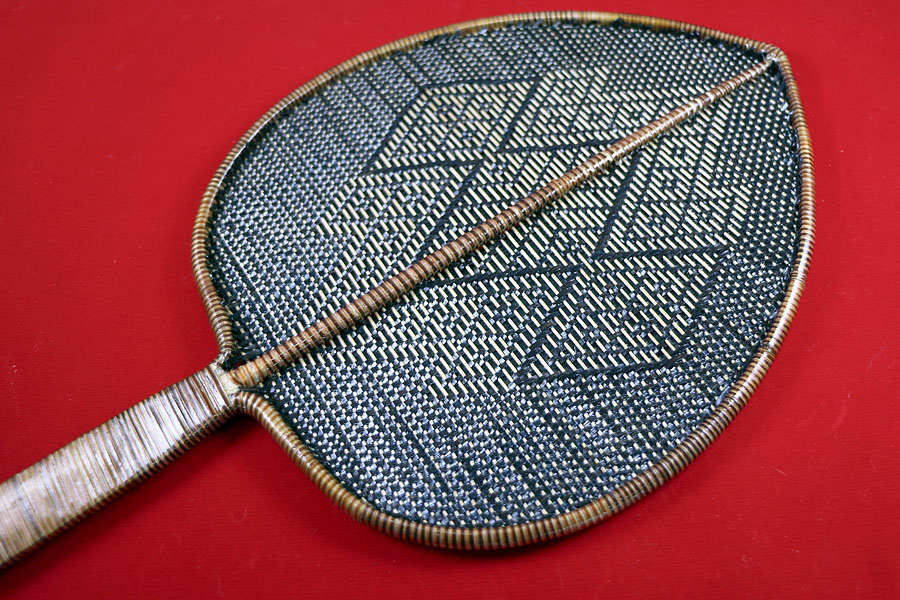
Red background
Summary
Your success at selling something on-line may depend entirely on the quality of your product images. I've seen lots of horrendous product images and I know from my own experience that a poor quality image does nothing to make me buy the product being advertised.
Virtually every camera and smartphone these days is capable of taking excellent quality images and if we use a little time and effort (without needing to spend very much money at all) we can get much better product photographs.
The techniques decribed on this page will not get your product photographs featured in the pages of expensive, glossy magazines. But that wasn't my objective.
The only objective is to help you take product photographs that will help you to sell more products.

