Electra Studio Lighting Review
Video Review
You can watch my video review of this lighting kit on YouTube at the following link:
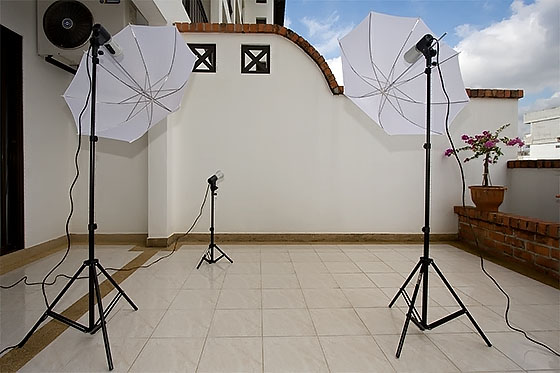
Excella 'Stardust Plus' Cheap Studio Lighting Kit

Sample Images
A few photos taken using my budget Electra studio lighting kit.
Clicking on the thumbnail images will open a larger image in a pop-up window.
Lens: Canon EF 17-40mm f/4L
ISO: 200
Aperture: f/13.0
Shutter speed: 1/160
Focal length: 40mm
EC +/-: 0
Monopod/Tripod: No
Flash: Electra lighting
Extender: No
File Size: 142 KB
Lens: Canon EF 17-40mm f/4L
ISO: 200
Aperture: F11
Shutter speed: 1/160
Focal length: 36mm
EC +/-: 0
Monopod/Tripod: No
Flash: Electra lighting
Extender: No
File Size: 165 KB
Lens: Canon EF 70-200mm f/4L
ISO: 100
Aperture: F8
Shutter speed: 1/160
Focal length: 200mm
EC +/-: 0
Monopod/Tripod: No
Flash: Electra lighting
Extender: No
File Size: 127 KB
Lens: Canon EF 70-200mm f/4L
ISO: 100
Aperture: F8
Shutter speed: 1/160
Focal length: 144mm
EC +/-: 0
Monopod/Tripod: No
Flash: Electra lighting
Extender: No
File Size: 141 KB
Lens: Canon EF 100mm f/2.8L IS Macro
ISO: 400
Aperture: F11
Shutter speed: 1/125
Focal length: 100mm
EC +/-: 0
Monopod/Tripod: No
Flash: Electra lighting
Extender: No
File Size: 132 KB
Lens: Canon EF 100mm f/2.8L IS Macro
ISO: 400
Aperture: F11
Shutter speed: 1/125
Focal length: 100mm
EC +/-: 0
Monopod/Tripod: No
Flash: Electra lighting
Extender: No
File Size: 92 KB
Lens: Canon EF 100mm f/2.8L IS Macro
ISO: 100
Aperture: F9
Shutter speed: 1/200
Focal length: 100mm
EC +/-: 0
Monopod/Tripod: No
Flash: Electra lighting
Extender: No
File Size: 103 KB
Lens: Canon EF 100mm f/2.8L IS Macro
ISO: 100
Aperture: F13
Shutter speed: 1/200
Focal length: 100mm
EC +/-: 0
Monopod/Tripod: No
Flash: Electra lighting
Extender: No
File Size: 153 KB
Lens: Canon EF 85mm f/1.8
ISO: 100
Aperture: f/10
Shutter speed: 1/200
Focal length: 85mm
EC +/-: 0
Monopod/Tripod: No
Flash: Electra lighting
Extender: No
File Size: 111 KB
Lens: Canon EF 17-40mm f/4L
ISO: 200
Aperture: f/13
Shutter speed: 1/200
Focal length: 22mm
EC +/-: 0
Monopod/Tripod: No
Flash: Electra lighting
Extender: No
File Size: 169 KB
Introduction
Ekasilp manufacture a complete range of studio lighting and accessories at prices a lot lower than other manufacturers. I am normally a believer in buying the best I can afford because experience has show that buying cheap is often a false economy. My dilemma was that I wanted to play with some studio lighting but didn't want to spend a fortune.
When I saw the Excella kits advertised in a local photography shop (I live in Thailand), they seemed to fit the bill and the prices were very attractive. If you need the best in reliability and robustness this equipment may not be for you, but the kit I bought has so far exceeded my expectations and has given me the chance to experiment with a studio lighting set up.
Unfortunately, the information provided by Ekasilp is not very good or very comprehensive. They actually understate the capabilities of their equipment and I have been pleasantly surprised regarding various functions I have discovered.
Local shops selling the equipment didn't know very much about it either, and I couldn't find anything useful on-line. If you are looking for information, I hope this helps.
The Stardust Flash System
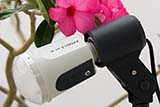 These are the simplest type of flash units available in the range and they come in three different output capacities: 30 W/S, 50 W/S and 80 W/S. The 80 W/S model with an 'M' designation (which stands for either Main or Master) has a PC-synch socket and a test button. Once set up, pressing the test button on the 80M flash will trigger all the lights in your lighting set up.
At the time of writing I've been using the system for over three years and have had no problems. I don't use it that often - and I don't use my equipment in extreme conditions - but it has always worked reliably and safely. There have been no equipment failures or electric shocks.
Some caution is required due to how the lighting system works. When switched on, the lights store a charge. After you have finished and switched off and unplugged everything, remember to press the test button on the 'M' unit in order to fire the flashes thereby discharging them.
Triggering Methods
The lights can be triggered in various ways.
- By connecting a standard synch-cord (provided with the kit) from the camera to the 80M strobe.
- By using the on-board (or an external hot-shoe mounted) flash on your camera; either will trigger the studio flashes.
- By using an external infra-red flash transmitter. The Electra FT-01 flash transmitter sells in Thailand for about Bt1,800 and uses two AA batteries. It fits on the hot shoe but there is no electrical connection through the hot shoe. A small cable connects the flash transmitter to the synch-cord socket on the side of the camera.
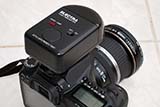 I didn't like the idea of using a synch-cord because it's easy to trip over, and I thought that popping up my on-board flash might be distracting when photographing people so I therefore bought an FT-01 flash transmitter.
There is also another problem with using the camera's pop-up flash, as described below.
The FT-01 flash transmitter works fairly well and gives you the freedom to roam around without having a synch-cord attached to your camera. However, it only works if in a line-of-sight of the 'M' flash unit. If you get into the wrong position it will stop working.
With the FT-01 there is no electrical connection through the hot shoe connection on the camera. A short cable is supplied that connects the FT-01 to the camera's PC-synch socket.
It takes two AA-size batteries, and these should last for about eight hours. The unit switches off after three minutes to save power. According to Electra, the working range is 45m. I haven't tried this, but I can't imagine why you would be so far away from your lights.
If I start having problems with the FT-01 flash transmitter, I revert to the synch-cord.
Using a flash on the hotshoe purely to trigger the studio lights makes no difference to the exposure because its tiny output is insignificant to the studio lighting.
Be aware that if you trigger the studio lights with a flash you need to turn ETTL off. ETTL fires a pre-flash, which triggers the lights before the shutter opens. On my 40D I can't turn ETTL off for the pop-up flash. However, I can turn ETTL off and go into manual mode if an external Speedlite is mounted.
For the purpose of simply triggering the studio lights, I don't want or need a large Speedlite. The Canon 90EX performs this task well and is so small and light that it is barely noticeable on the camera.
I haven't tried this but it should also be possible to use the Canon ST-E2 with a Speedlite located off-camera somewhere in the room. The ST-E2 would fire the Speedlite, and the light from the Speedlite would in turn trigger the studio lights.
Again, if attempting this you would need to turn ETTL off otherwise the pre-flash will trigger the studio lights. In manual mode you can select the flash power output. A lower output will save battery life, but the lowest output (1/64) using my 90EX isn't bright enough to trigger the lights. Just put the flash on full power, or if you have time experiment to see which is the lowest power you can use that will trigger the lights.
Kits
For the beginner, Ekasilp supply complete kits to get you started. In Thai Baht the prices range from Bt4,900 to Bt47,900. What surprised me was the completeness of the kit I bought. I was expecting to have to at least buy a synch cord but there was one included.
The kits contain everything you will need, including all holders and lightstands, carrying bag(s) and a DVD guide to basic studio lighting. The cheaper kits are a good way to get started on a budget. With the very cheapest kit (which only has one main light source) you would probably need to buy a reflector to even up the lighting a little when shooting portraits but the other kits contain everything you need.
- Stardust Kit: 80 W/S M flash with holder, stand, and diffusing umbrella. Synch-cord. 30 W/S flash with holder and stand for lighting the background. (Bt4,900)
- Stardust Plus Kit: 80 W/S and 80 W/S M flashes with holders, stands, and diffusing umbrellas. Synch-cord. 30 W/S flash with holder and stand for lighting the background. (Bt7,900)
- Casa Kit: As per Stardust Kit but additionally with an 80cm x 80cm softbox, an 150 W/S Casa light unit, and a refector umbrella. (Bt12,900)
- Casa Plus Kit: Two 250 W/S softbox units, an 80 W/S Stardust light, two reflector umbrellas and two bags. Synch-cord. (Bt19,900)
- Prisma Kit: Two 500 W/S Prisma flash units (one with a 100cm x 100cm softbox and one with a diffusing umbrella), one Casa 200 W/S unit, flash transmitter, three reflector umbrellas and two bags. Synch-cord. (Bt29,900)
- Prisma Plus Kit: One 500 W/S, one 800 W/S Prisma unit, two Casa 250 W/S units, one square 100cm x 100cm softbox, one octagonal 100cm softbox, flash transmitter, four reflector umbrellas, and three bags to carry everything. Synch-cord.
Metering
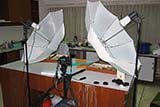 These lighting systems are not dedicated to the camera and there are no fancy through-the-lens (TTL) metering techniques used that measure light from the scene and then vary the output from the flash units accordingly.
Light output with the more expensive units can be controlled but with the basic Stardust units (such as mine) you just get a blast of light at full power for - I think - 1/1000 of a second. There are different ways you can go about setting exposure.
With a digital camera it is best just to take a few test shots and then to check the image and histogram. Of course, you can only use a shutter speed that is the same, or slower than, the camera's maximum synch speed.
Take some test shots and then it is a case of changing the ISO, shutter speed and/or aperture value or physically moving the flash units towards or away from the subject to get the right exposure. This method is a bit crude but it works.
The DVD tutorial that comes with the kits recommends the use of a hand-held flash meter to measure incident light, and it so happens that Ekasilp also sell a budget flash meter. It is not nearly as fancy as, for example, a Sekonic model but a lot cheaper.
The Ekasilp DVD, supplied with the kit, shows how to use a flash meter to set up individual lights in a system consisting of a key light, fill light, background light, and a snoot to accent your model's hair.
For a long time I just used the trial and error method, that is, taking shots at different exposures and checking the image and histogram on the camera display. Sometimes this could take a while so I invested in a Sekonic L-308S Flashmate.
Using a light meter makes setting the exposure very easy and quick. It also gives me confidence that the exposure settings I use are accurate, whereas with the trial and error method they could still be a little out.
Compared To Camera Manufacturer Dedicated Systems
The entire Stardust Plus Kit was cheaper than my Canon ST-E2 flash transmitter alone. By the time you throw in a couple of dedicated Speedlites, light stands and umbrellas, the cost of a dedicated system will be considerably higher.
One advantage of a dedicated system is that it runs on batteries so you can use it in the middle of a field with no problems. Dedicated systems also feature some very fancy metering systems that do a lot of the exposure calculations for you.
When using the ST-E2 to control two Speedlites (or two groups of Speedlites) it is possible to alter the ratio of the lighting simply by flicking a switch. With the studio lighting I have to physically move the units to achieve the same effect.
The amount of artificial light needed to reproduce daylight is enormous. Studio lights can be quite blinding but the result is good. Using my battery-powered Canon 550EX isn't quite the same even if it is relatively powerful for a hot-shoe flash. The recycling time of the AC studio lights is also a lot faster, as would be expected.
It's not a case of one system being better than the other, but for different situations - and different budgets - one system might be more suitable for your needs.
Product And Macro Photography
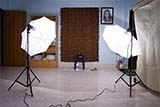 I actually bought this kit as a direct result of wanting to do some product photography.
Initially I made a lightbox frame from PVC water pipe. The plan was to cover it with white fabric and then to purchase some suitable continuous lighting. I live in provincial Thailand and I couldn't find suitable lighting of the correct colour temperature anywhere.
I saw this kit and it looked perfect for my needs. However, because the kit included diffusing umbrellas it did away with the need for a lightbox. I built a lightbox but never used it.
On occasions I've been too lazy to set up the studio lighting and I've tried to do product photography using my Canon Speedlite 550EX. Whichever way I've tried - on or off camera using the Canon ST-E2 - it just doesn't work.
Using one lighting source (even if I also use a reflector) always creates nasty shadows. This never happens using the kit lights because each one cancels out any shadows that might be caused by the other. The lighting is natural, balanced, and very even.
Portraits And Model Photography
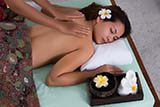
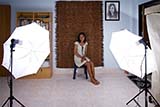 Apart from product photography, my other intended use of the lights was for portrait work. I was unexpectedly asked to help with the advertising of a local spa and massage shop. This little job was a real stroke of luck. Not only was it fun; I got to photograph semi-naked Thai girls, and now I also get free massages!
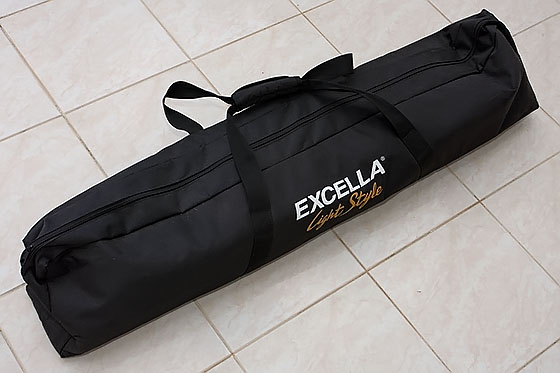
The rooms inside the shop were very dark but with the studio lighting kit I was able to get a fairly natural looking scene with balanced light. Taking the kit on location (in the bag supplied) proved to be quite easy.
At home I bought a mat made from natural materials, which is the kind normally used by Thais when they sit and eat on the floor. I hung it on the wall to be used as a portrait background.
It works well and together with the studio lighting kit it was a very cheap way of creating a small home studio.
Contact Details And Support
Web Site: Ekasilp Industry Limited
Ekasilp make a wide range of photographic accessories. In absolute terms, nothing the company makes is anywhere near the best available in terms of quality, but from what I have seen I think the products offer excellent value for money.
Provided that your equipment won't be subject to really harsh conditions and abuse, Ekasilp products should be quite sufficient in most cases and they won't cost a fortune.
Other Review Pages You May Be Interested In

