Canon EOS M Mirrorless Camera Review

Sample Images

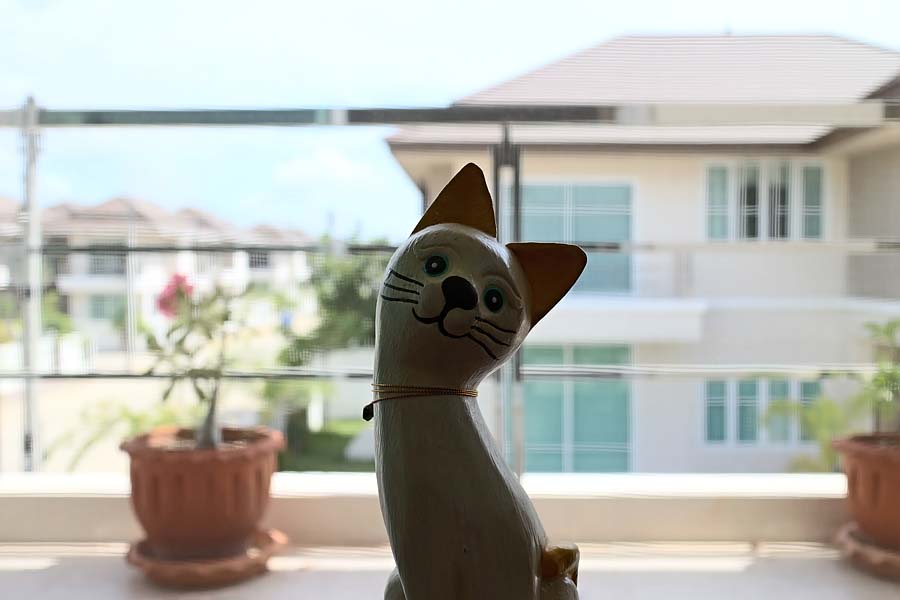
Canon EF-M 18-55mm STM IS | ISO:2000 | Aperture: f/4 | Shutter Speed: 1/30s | Hat Yai, Thailand
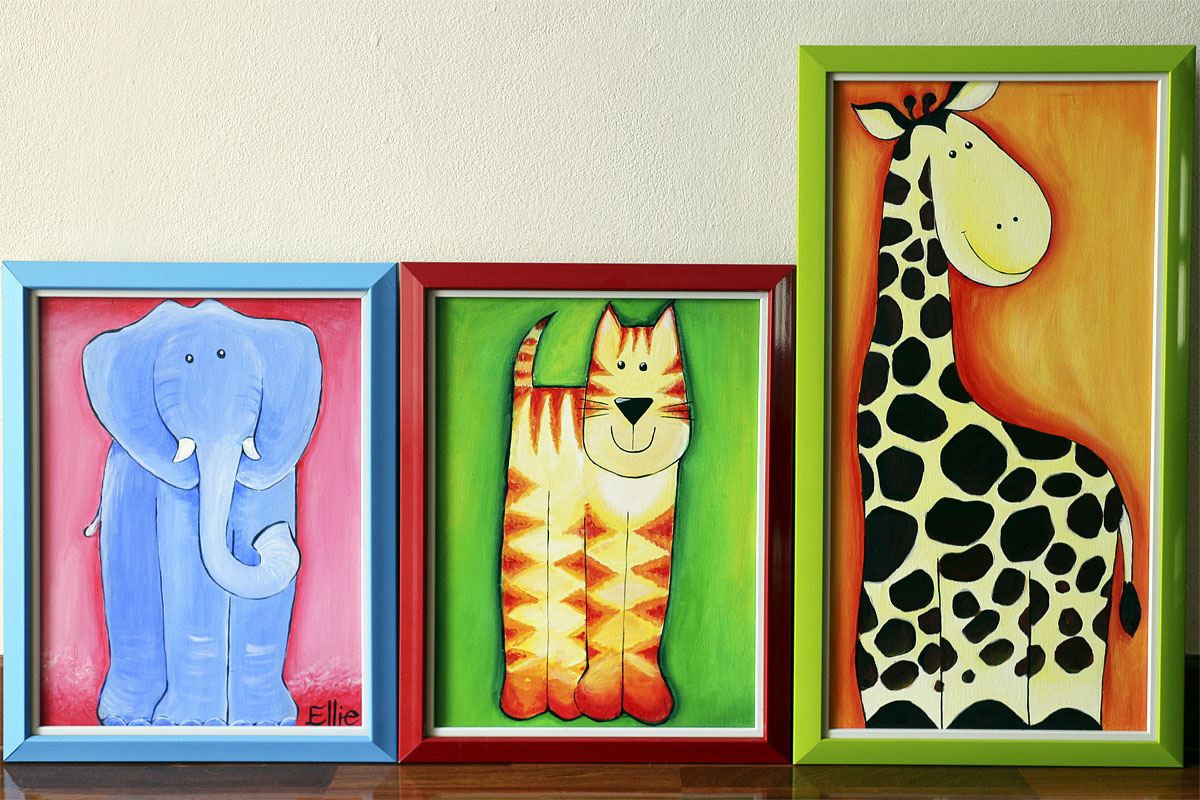
Canon EF-M 22mm STM | ISO:100 | Aperture: f/2.8 | Shutter Speed: 1/40s
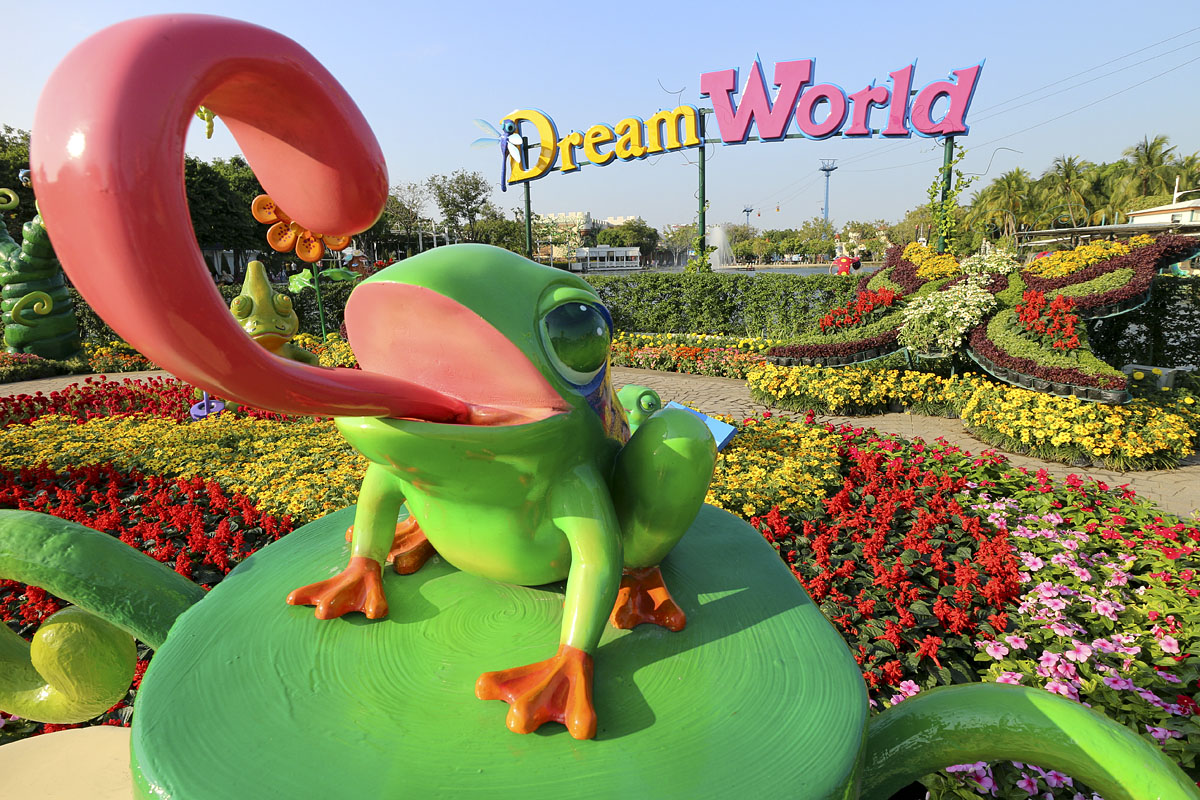
Canon EF-M 11-22mm f/4-5.6 STM IS | ISO:100 | Aperture: f/8 | Shutter Speed: 1/160s | Dream World, Bangkok, Thailand
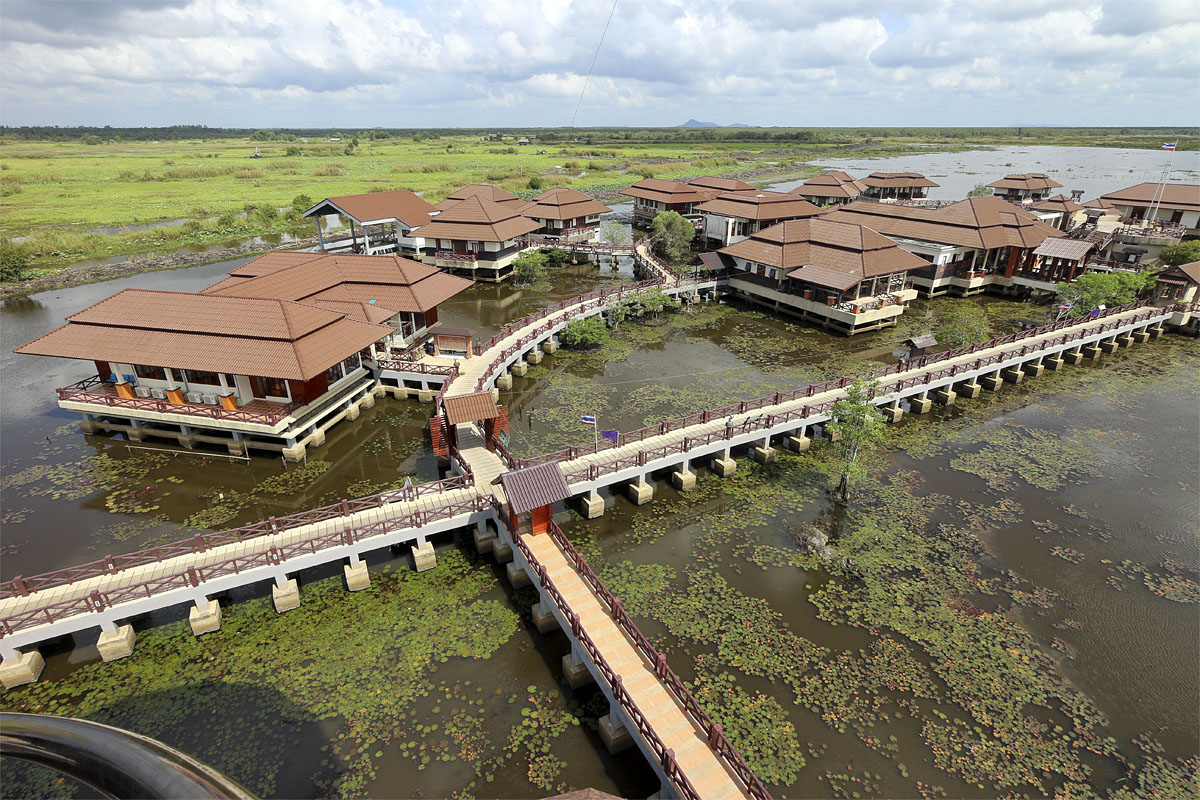
Canon EF-M 11-22mm f/4-5.6 STM IS | ISO:100 | Aperture: f/10 | Shutter Speed: 1/200s | Thale Noi, Phattalung, Thailand
The Good and the Bad
- Small size
- Light weight
- Good image quality
- Good high ISO performance
- Special adapter allows use of all Canon lenses
- Flash hotshoe
- Canon EF-M lenses are compact and high quality
- Touch screen interface easy to use
- Full HD video
- Continuous video AF
- Poor battery life
- AF not as fast or accurate as DSLR AF
- No optical or electronic viewfinder
- Difficult to use with long lenses
- No cable release socket
Introduction
 A few years ago I got really fed up with hauling around a DSLR body and a bag of lenses and accessories. There are still occasions when this is acceptable - and I have no intention of getting rid of my DSLR equipment just yet - but I like to have a camera on me all the time and I needed something lighter and more convenient.
At the end of 2009 I bought a Canon S90. I kept it in a small pouch hanging from my belt where it was almost unnoticeable, but it was always there. I took thousands of photos with that camera and it served me really well.
The S90 image quality was better than most cameras of that size, but on the occasions when I took shots with my trusty old Canon 40D I could really tell the difference. My daughter arrived in 2011 and I wanted better image quality to record her growing up. It was a dilemma.
The EOS M mirrorless camera was a very welcome announcement, but I had reservations because of negative comments on various websites. I took the plunge in June 2013 and I am writing this as a fairly new user. So far I have been quite impressed.
It is slightly bigger than my S90, but the APS-C sensor is the same physical size as in my 40D. It's a newer design with more megapixels and therefore the image quality should be better than the 40D.
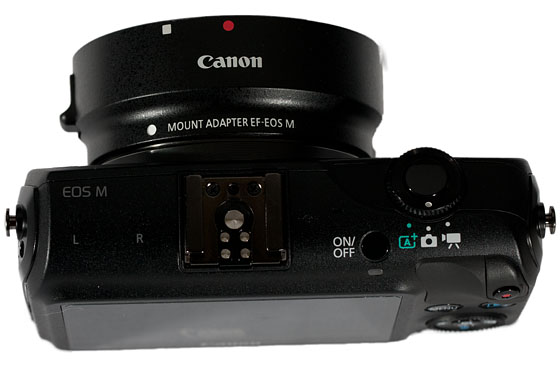
I bought a kit containing the Canon EF-M 22mm f/2 STM and Canon EF-M 18-55mm f/3.5-5.6 IS STM lenses and also the Speedlite 90EX flash. I purchased the Canon EF-EOS M Mount Adapter so that I could also use my EF and Canon EF-S Lenses.
I had one day to familiarise myself with the camera before going on a short trip. In addition to the equipment listed above, I took my Canon EF 70-200mm f/4L IS and Canon EF-S 10-22mm f/3.5-4.5 lenses.
I plan to add more to this page, but for the time being here are some initial thoughts and impressions.
EXIF Information
With the sample images on this page I haven't given the exposure settings but I have preserved EXIF information in the image files.
This information can be viewed with the software of your choice. I find the quickest and simplest way to view basic exposure settings is to use an EXIF plug-in for your preferred browser. There are quite a few available and they are free to download.
Kits
It seems that different kits are available in different countries. Where I live in provincial Thailand I had the choice of three kits.
- Canon EOS M body + EF-M 18-55mm STM IS
- Canon EOS M body + EF-M 22mm STM + adapter for EF and Canon EF-S Lenses
- Canon EOS M body + EF-M 22mm STM + 18-55mm IS STM + Speedlite 90EX
Carrying Cases
 For my DSLR equipment I have used LowePro Mini Trekker backpacks for a long time. However, a few years ago I started to develop an eversion to lugging around a heavy backpack full of camera gear. A backpack starts to get very heavy when loaded with DSLR bodies, lenses and flashes, etc., and it's even worse if you also want to carry a tripod and ballhead.
The little S90 in its pouch on my belt was perfect and I didn't even notice it was there. My S90 belt pouch is looking quite tatty these days from wearing it all the time for several years.
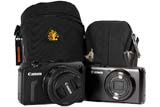
Unfortunately, the EOS M isn't quite as small as the S90. When I take it out with just the EF-M 22mm f/2 STM I use a small lens case on a padded waist belt. The case wasn't designed for a camera body, but it works. The belt is very comfortable and the lens case isn't much bigger than my S90 pouch. The belt and pouch are local made-in-Thailand products from Fotofile. See photo.
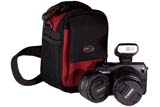
If I want to carry more than the EF-M 22mm, I picked up a small LowePro Z40 case. It's really too big to put on a belt, but it has a shoulder strap and it is comfortable on my shoulder. It will hold the EOS M and EF-M 18-55mm IS STM combo and also the 90EX flash. At a push, I can put the EF-M 22mm in the side pocket, but it doesn't feel that secure.
I also have a LowePro Inverse 200AW beltpack. This swallows up the EOS M system with ease and also gives me room for the EF-M adapter and a couple of smallish EF or EF-S lenses.
All of these options take the weight off my back, which is the most important consideration for me. There have been times in the recent past when I stopped for a break in a coffee shop after walking around with my backpack and then didn't want to continue because of the load on my back.
In colder climes I would wear more clothing and I could store lenses and accessories in pockets. However, it is very hot all year round where I live and I wear as little as possible.
Despite having a collection of cases already, I have a feeling that I will be buying more. I have my eye on the EF-M 11-22mm STM ultra wide angle lens and will need a comfortable case to carry the EOS M system with three lenses and flash that is bigger than the LowePro Z40, but smaller than the Inverse 200AW beltpack.
Build Quality and Feel
 I've owned Canon cameras since 1982 when I had a Canon A1 that served me well for many years. I've never had a Canon camera that didn't feel well built, and this is no exception.
I have small hands, yet even so it still feels a bit fiddly. Of course, I bought the EOS M because I wanted a small camera and so this really can't be helped.
There is a small rubber finger grip on the front of the camera and some rubber around the video start/stop button on the rear. These grips help a little, but not very much.
Slipperiness in the hand was one of the criticisms of the S90/S95 and Richard Franiec's grip became quite popular. Possibly something similar will be made for the EOS M, but as far as I am aware there is nothing at the moment.
Touch Screen
This is my first camera with a touch screen. When I used to work in software development I hated people putting greasy fingerprints on my monitor and I have an aversion to touch screens. However, the touch screen on the EOS M works well and it is intuitive.
Without a touch screen I have to work out whereabouts to go in the menu system to change a setting. With the touch screen, I simply tap the relevant setting and this gives me the option to change it. I also find it very quick changing AF points, rather than pressing a button to bring up the AF points and then pressing other buttons to select the area I want.
In playback mode the touch screen once again comes into operation. I am used to buttons to zoom in and out, but with the EOS M I have to use my finger and thumb. If you are used to other touch screen devices it will come naturally. If you aren't, then it needs a little practice.
Tapping on the touch screen can also be set to operate the shutter instead of the shutter button.
No optical or electronic viewfinder
 Apart from the slow autofocus, this seems to be the biggest gripe with most people. The S90 I have been shooting with for almost four years has no viewfinder and that has never been a problem for me.
With touch screen controls on the EOS M, if there was an eye level finder it would be necessary to take the camera away from your eye to make any adjustments or change the focus point. It's not like an SLR where you can nake adjustments while continuing to look through the finder.
With Canon EF-M Lenses and normal or wide SF and Canon EF-S Lenses it's not bad. However, whenever I attach a telephoto lens to the EOS M I automatically raise the camera to my eye. The additional weight and length of a telephoto makes the camera difficult to hold steadily at arms length while you are peering at the screen.
However, if I was taking lots of photos with a long telephoto, such as a birding trip, I wouldn't take the EOS M.
Composing using the display isn't great in very bright sunlight, either. The image is difficult to see and focus points become invisible.
If enough people complain, Canon may introduce an optional finder. Alternatively, you could buy another manufacturer's finder and attach it to the hotshoe. The alignment probably wouldn't be perfect, and you wouldn't be able to use flash, but it's a personal choice.
Strap
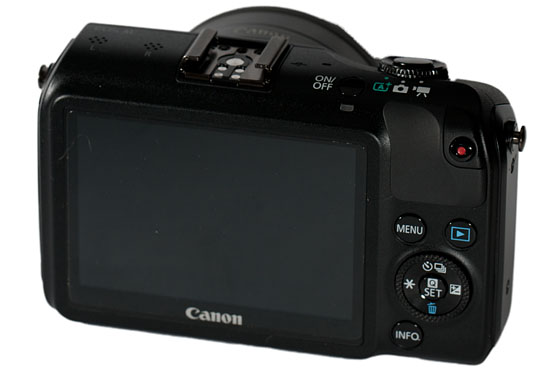
The small EOS M body has a miniature strap that is about half as wide as normal DSLR straps and has different style connecting lugs that are secured by turning locks through 90 degrees.
RAW Files
One of the reasons I chose the S90 was its ability to shoot in RAW. I started shooting RAW with my SLR many years ago and this facility allowed me to keep the same workflow. However, shortly after acquiring the S90, I reverted back to shooting in large JPG format.
The EOS M can record RAW files, but I am just using it to shoot JPG at the moment. When I experimented with my S90 the hassle of converting RAW files and the extra storage space outweighed any benfits that I saw.
Many new cameras come with some handy in-camera post-processing to correct vignetting and chromatic aberration, and these features only work with JPG files.
I may play with RAW capture later, but at the moment it isn't too important.
File Sizes
Camera effective pixels - approx. 10 million
Still images:
- Large and RAW - 5184 x 3456 pixels
- Medium - 3456 x 2304 pixels
- Small 1 - 2592 x 1728 pixels
- Small 2 - 1920 x 1280 pixels
- Small 3 - 720 x 480 pixels
- Widescreen - 3648 x 2048 pixels
- 1920 x 1080 (29.97, 25, 23.976 fps)
- 1280 x 720 (59.94, 50 fps)
- 640 x 480 (30, 25 fps)
Movie Mode
I don't tend to use movie mode very often. My wife is more likely to take some movie footage than me. Of the limited footage that she has taken so far, three things about the EOS M movie mode have impressed me compared to the S90 movie mode.
Firstly, the combination of hybrid AF system and lens stepper motor technology means that there is now continuous silent AF while shooting movies.
Secondly, the movie image size is now exactly the same size as the full HD display on my Lenovo A300.
Thirdly, the image quality is much better. The improved image quality and increased size looked great when I played some movies back on my computer.
Autofocus
 This is what most EOS M complaints are about on Internet forums. I just got back from a short trip where I had an absolute blast with this little camera and I also got some shots that I am very pleased with. Image quality is excellent for such a little body and I see no problems with submitting images to stock agencies or printing 30" x 20" prints.
One forum comment I read implied that with the original firmware (1.0.6) the AF was unusable. Comments such as this from people who probably have never handled the camera are just ridiculous. Canon has had a few hardware and firmware problems in recent years, but the company isn't in the habit of releasing 'unusable' products.
The AF isn't the fastest and there is a tendency to hunt quite a lot before achieving focus with some lenses in certain conditions with certain camera settings, but it isn't terrible by any means.
The Canon EF-M Lenses lack a dedicated switch to alternate between AF and MF and this needs to be done via the camera's menu system. There are three settings: AF, MF and AF+MF. The AF+MF setting allows manual focus after the camera has achieved auto focus. With EF and Canon EF-S Lenses simply use the switch on the lens to do the same thing without going through the menu system.
There are three different methods of focusing.
'Face + Tracking' tries to identify human faces and once it has done so it will track the face if there is any movement.
'Flexizone - Multi' will highlight multiple points in the scene (up to 31) where focus is achieved. If you want to focus on a specific part of the scene, the screen is divided into nine areas and tapping on one area will direct the focus to that point.
'Flexizone - Single' does what it says and just uses one focus point. The focus point can be moved around the scene in the same way, by tapping on the display.
Because the camera can accept Canon EF-M Lenses and the entire range of EF and Canon EF-S Lenses and because it can be set to a variety of AF modes, there are many different permutations. With different lenses in different situations, one AF method may work better.
With some lenses there is certainly a lot of hunting. AF didn't seem too bad with the EF 70-200mm f/4L IS, but excessive hunting is very noticeable with the EF-S 10-22mm f/3.5-4.5 regardless of the type of AF method.
 Most shots I have taken so far were in 'One Shot' AF mode. I played around a little with the AI Servo mode by snapping passing motorcyclists travelling at around 50kph and it didn't seem too bad. It is certainly a lot better than the S90 AI Servo mode, but I'm not sure whether it is quite as effective as AI Servo on my 40D. Possibly it is, but it isn't a 7D, 1D X or 5D III.
To get the fastest shutter speed for the following umbrella shots I selected ISO 800 and after putting the camera in AV mode I selected the maximum aperture. I normally leave the camera in 'Face + Tracking' mode, but got better results with AI Servo when the camera was set to 'Flexizone - Multi'.
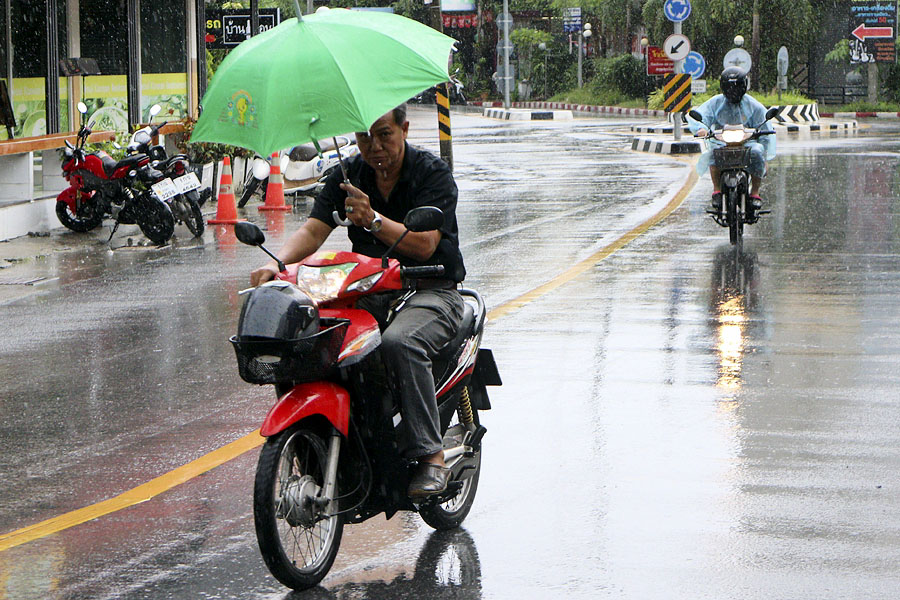
Canon EOS M AI Servo Performance
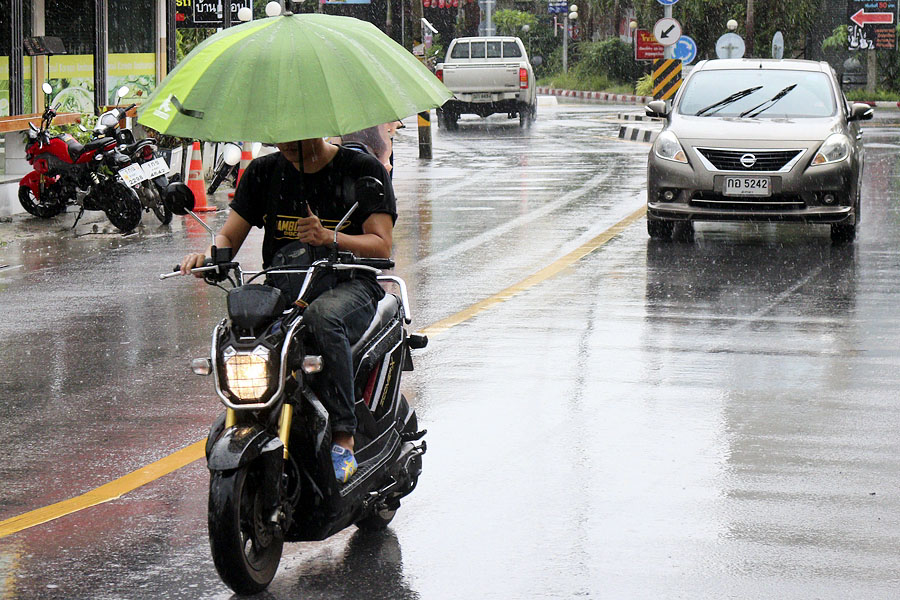
Canon EOS M AI Servo Performance
If you are a professional photographer and a reliable, accurate AF system is the difference between being able to complete an assignment or not, this definitely isn't the camera for you. I don't believe Canon ever intended the EOS M to be a rival to the 1D X or 5D III. Potential buyers of the EOS M need to realise its limitations. It will be perfect for some people because of its small size, flexibility and image quality, but not for others.
On 27 June 2013 Canon released a firmware upgrade (V 2.0.2) that was promised to speed up the autofocus by a factor of 2.3 times. I have upgraded and from the limited testing I have done so far, the AF looks to be a LOT faster. The comments above were made after using the camera with firmware version 1.0.6 loaded.
The focus points are not very small and cannot be changed. While out shooting I saw a dragonfly land on a branch of a tree. I was using my EF 70-200mm f/4L IS at the time and with my 40D this would have been an easy shot.
The dragonfly was very patient and accommodating with me and waited for a long time for me to take the photo. However, I just couldn't lock focus. I tried various AF options but the camera kept focusing on the background. I wasn't able to hold the camera very steady because I was holding it at arms' length so that I could view the LCD.
On another occasion I was in a longtail boat on wetlands in the south of Thailand and we encountered some water buffalo swimming in the water. The boat was moving, but only slowly. I tried to photograph the buffalo, but every shot was blurry.
This was another little reminder that the EOS M is not an SLR. It's fine 95% plus of the time, but I occasionally run into situations where the EOS M can't do what my trusty old 40D does.
Basically, for static subjects the EOS M is great. However, when you bring movement into the equation - whether it is you moving or the subject - the AF can be rather hit and miss.
Macro
 With such a narrow depth of field I seldom find that autofocus is very effective with macro photography. My usual method is to mount the camera on a tripod, put the lens into manual mode, and then to use Live View with 5x or 10x magnification to check the image as I focus manually.
With my 40D this method requires no menu changes, however, it does with the EOS M if an EF-M lens is attached to the camera. It is necessary to go into Focus Mode in the menu options and change from AF to MF. After doing this a small magnifying glass symbol appears on the Live View screen and pressing it repeatedly will toggle through 1x, 5x and 10x magnification. It is necessary to do this via the EOS M menu system because there is no AF/MF switch on EF-M lenses.
If an EF or EF-S lens is mounted on the EOS M using the EF-EOS M Mount Adapter the magnifying glass icon appears when the lens is switched to MF and disappears when it is switched to AF.
Exposure Modes
With many Canon cameras there is a mode dial on the top to select the exposure mode. There is normally a green box fully automatic mode, modes for various types of scene, fully manual, Program AE and shutter or aperture priority. In addition, with some cameras, there are also some custom settings that you can program yourself.
The EOS M exposure modes are similar. However, there is no mode dial to select all the different options because the user interface is through the touch screen, and some of the terminology has changed. The EOS M mode dial has just three positions.
Scene Intelligent Auto
Green box fully automatic mode is referred to as Scene Intelligent Auto. This is selected by turning the mode dial. The icon for Scene Intelligent Auto is a green box with an A in the middle and a + sign in the top right corner.
In this mode the camera will attempt to analyse the scene and select the appropriate settings on the camera. It is intended for those who have no idea how exposure works. A symbol in the top left corner of the display indicates what type of scene the camera has identified.
While in this mode, you can change very little. You can change the AF mode, but that's about it.
By putting the mode dial into the centre position, you can choose Creative Zone or Basic Zone modes.
Basic Zone modes
These are: Creative Auto, Portrait, Landscape, Close-up, Sports, Night portrait, Handheld night scene, HDR backlight control
Again, these are for people who don't understand how basic exposure and camera settings work. For example, in the sport mode the camera will set a fast shutter speed, Flexizone-Single AF, AI Servo for moving subjects, and continuous shooting. I have never used these settings and prefer to control settings myself.
Creative Zone modes
In this mode you can select from (M) Manual, (AV) Aperture Priority, (TV) Shutter Priority, (P) Program AE.
For general shooting I usually just leave the camera on P with Auto ISO. On those occasions where I want to freeze action, create a blur, reduce the depth of field, etc, I will use AV, TV or M.
HDR Mode and Backlit Scenes
Our eyes and brains do a great job adjusting automatically when looking at scenes where there is a wide dynamic range. Unfortunately, cameras don't and it is always a problem taking photos where there are light and dark areas in the scene.
You can take several shots of the same scene, setting the camera manually each time for a different exposure by changing the shutter speed, not the aperture. You can then combine the images with suitable HDR software in post-processing. There is quite a lot of work involved and the end result often looks like a typical 'HDR' photo. If you have time and want to play around, this is one option.
There are some alternative methods that are a lot quicker. Click on the thumbnail images for a larger image.
High ISO Performance
 Great strides have been made in this area in recent years by sensor manufacturers. I have not kept up to date as a result of using an SLR that was introduced in 2007. My old 40D is already a technological dinosaur.
I have therefore been quite astounded with the high ISO performance of the EOS M. As a matter of course, I always include some Imagenomic Noiseware Professional noise reduction as part of my standard workflow after resizing.
With ISO values of 400 this step makes no difference as I can't detect any noticeable noise in the images. I could hardly believe the results when I did a quick test at ISO 12,800. My 40D only has a maximum ISO of 3,200 and the image quality at that ISO is terrible.
 At ISO 12,800 the images out of the EOS M are quite useable and they clean up very nicely with some noise reduction in post-processing.
I have yet to try ISO 25,600. Obviously there will be a further degradation in image quality, but in some very dark situations where simply getting a photo is the most important thing it could be quite useful.
The first photo here at ISO 12,800 is the full scene with noise reduction applied in post-processing.
Yes, you can still see some noise, but I think the noise level is acceptable for such a high ISO level and the performance is light years ahead of sensor technology from just a few years ago.
The second photo is a 100% crop from the same image without any noise reduction applied.
At concerts or other dark places where the subject is too far away for flash, or where flash is forbidden, the excellent high ISO performance will be very useful.
I took this photo in a dark Chinese Buddhist temple and I think that by not using a flash the image has retained some of the ambience of the original scene.
Light Metering
The settings follow standard Canon convention.
- Evaluative Metering - This is a general-purpose metering mode suited even for backlit subjects. The camera sets the exposure automatically to suit the scene.
- Partial Metering - Effective when the background is much brighter than the subject due to backlighting, etc.
- Spot Metering - This is for metering a specific part of the subject or scene.
- Centre Weighted Average Metering - The brightness is metered at the image centre and then averaged for the entire scene. This metering mode is for advanced users.
Battery Life
 With a fully charged new battery I took 197 still photos and my wife took 3 minutes and 20 seconds of video footage before the battery expired. IS and non-IS lenses were used and a fair amount of image reviewing was carried out during this time.
The touch screen must draw quite a lot of power, as does IS. The battery life isn't great, but I had already heard about this. At the time of purchase I wanted to buy another battery but the shop didn't have any stock. I am still waiting for them to contact me.
I definitely need two batteries and on some occasions I may need three, unless Canon introduce some new battery technology later.
Exposure Mode Settings
I am used to a mode dial on top of my cameras with Manual (M), Aperture Priority (AV), Shutter Speed Priority (TV), Program (P), Completely Automatic (AUTO) and a Custom (C) mode or three. The touch screen driven EOS M doesn't have one.
To change mode, just press the INFO button and you will see the current mode. Tap the mode on the touch screen and you will get the option to change. It's actually quite intuitive.
Creative Filters
The creative filters can be used in two ways. You can use them while shooting so that the filter is applied to the image before it is written to the CF card.
Alternatively, you can take a photo without a filter, display the image, apply a filter, and write it to the card with a different file name so that your original image is preserved. You can make limited adjustments to each filter effect.
I'm not sure who will use these filters. If you like getting creative with images you will probably want to do this kind of thing in post-processing with Photoshop where there is a lot more flexibility.
The Fish Eye effect might be useful at times, but for everything else my preference would be to use Photoshop in post-processing. The Soft Focus filter just makes images look out of focus.
Here are Canon's descriptions for the various filters:
- Grainy B/W - Makes the image grainy and black and white. By adjusting the contrast, you can change the black and white effect.
- Soft focus - Gives the image a soft look. By adjusting the blur, you can change the degree of the softness.
- Fish-eye effect - Gives the effect of a fish eye lens. The image will have a barrel-type distortion. Depending on the level of this filter effect, the area trimmed along the periphery of the image changes. Also, since this filetr effect willmagnify the image centre, the apparent resolution at the centre may degrade depending on the number of recorded pixels. Set the filter effect while checking the resulting image. With the fish-eye effect, the AF will be fixed at the centre AF point.
- Art bold effect - Makes the photo look like an oil painting and the subject look three-dimensional. You can adjust the colour and saturation. Note that the sky, white walls, and similar objects may not be rendered with a smooth gradation and may look irregular or have significant noise.
- Water painting effect - Makes the photo look like a water colour painting with soft colours. You can adjust the colour density. Note that night scenes or dark scenes may not be rendered with a smooth gradation and may look irregular or have significant noise.
- Toy camera effect - Gives a colour cast typical of toy cameras and darkens the image's four corners. By adjusting the colour tone, you can change the colour cast.
- Miniature effect - Creates a diorama effect. You can change where the image looks sharp. The camera will focus at the centre of the white frame and the AF method will be fixed at [FlexiZone - Single].
It was really convenient to use a filter which swapped one particular colour for another, or preserved one colour in colour and converted the rest of the image to black and white. To do this in Photoshop takes ages doing all the selections.
The panorama stitching facility with the S90 was also useful when taking multiple shots to stitch together later in post-processing. That is something else that isn't included in the EOS M.
Here are some actual examples. They have been resized, but other than that they are straight out of the camera with absolutely no post-processing at all. I didn't use a tripod, but all photos were taken from roughly the same place with the Canon EF-M 11-22mm STM IS lens set at the same focal length.
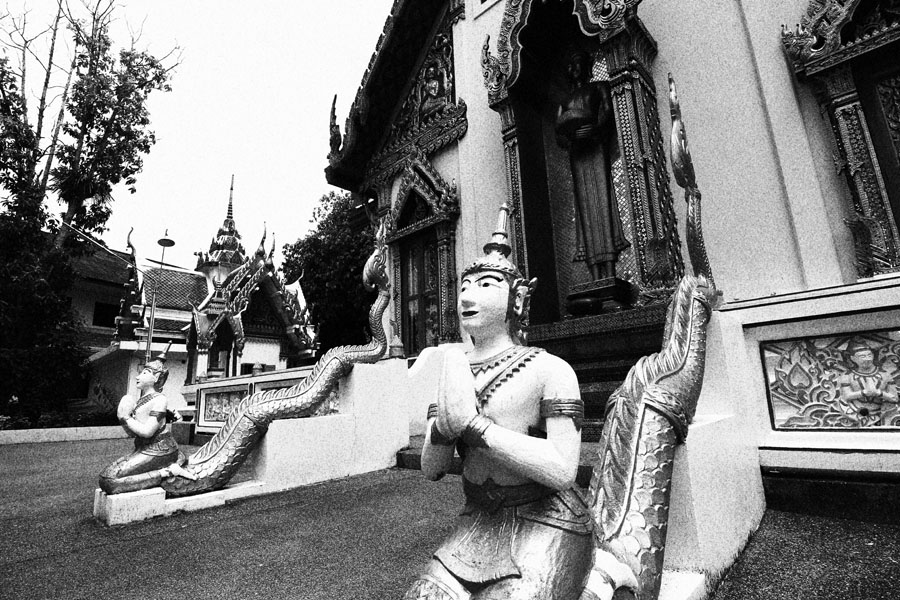
Canon EOS M Grainy B/W Creative Filter
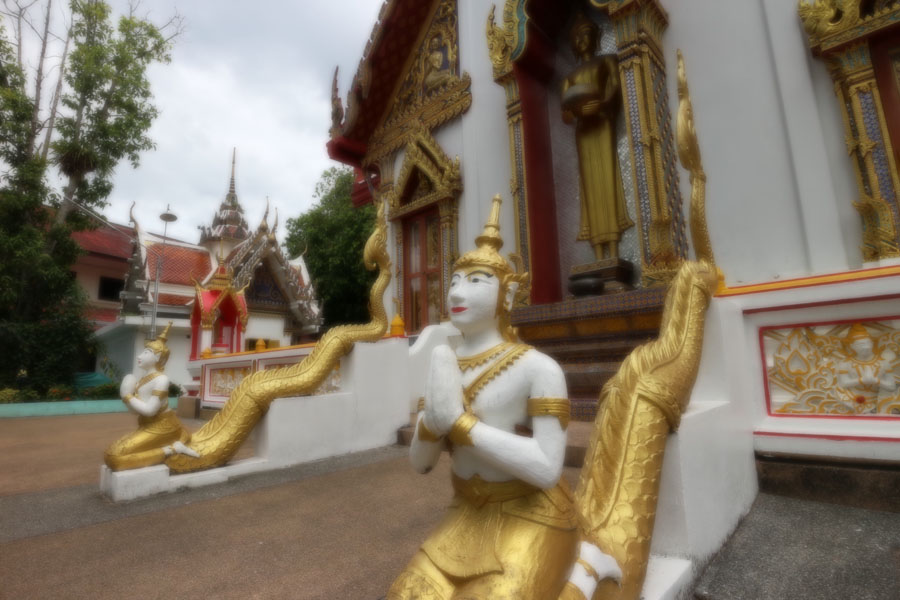
Canon EOS M Soft Focus Creative Filter
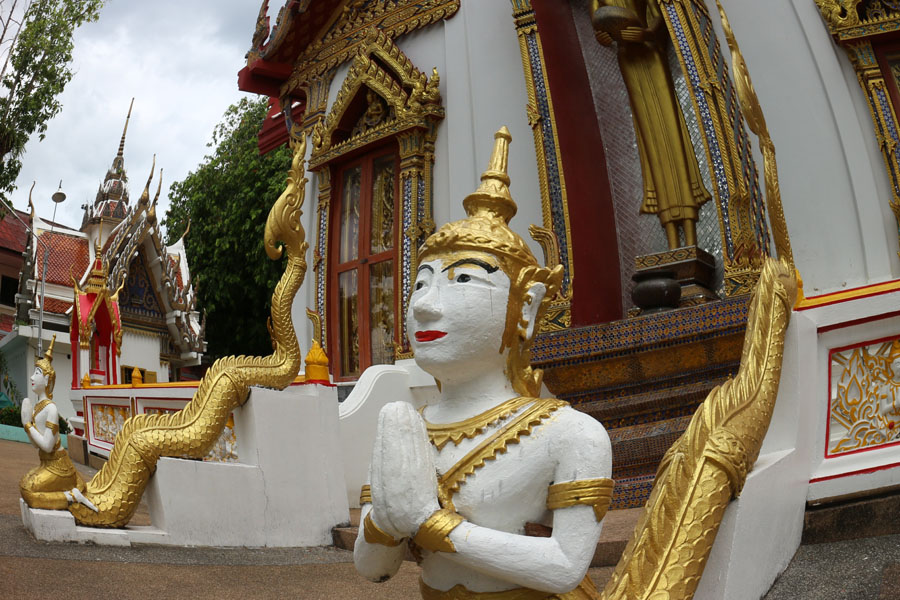
Canon EOS M Fish Eye Effect Creative Filter
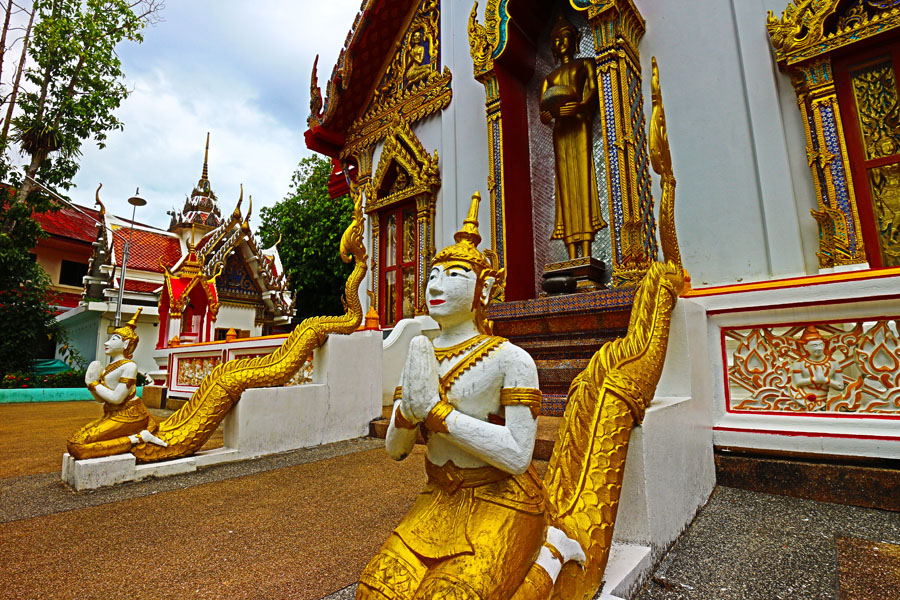
Canon EOS M Art Bold Effect Creative Filter
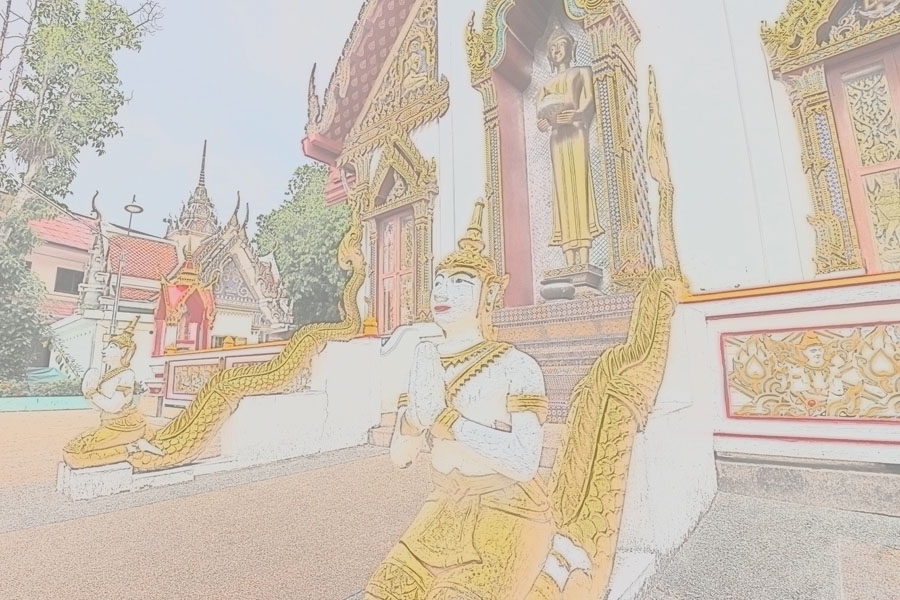
Canon EOS M Water Painting Effect Creative Filter
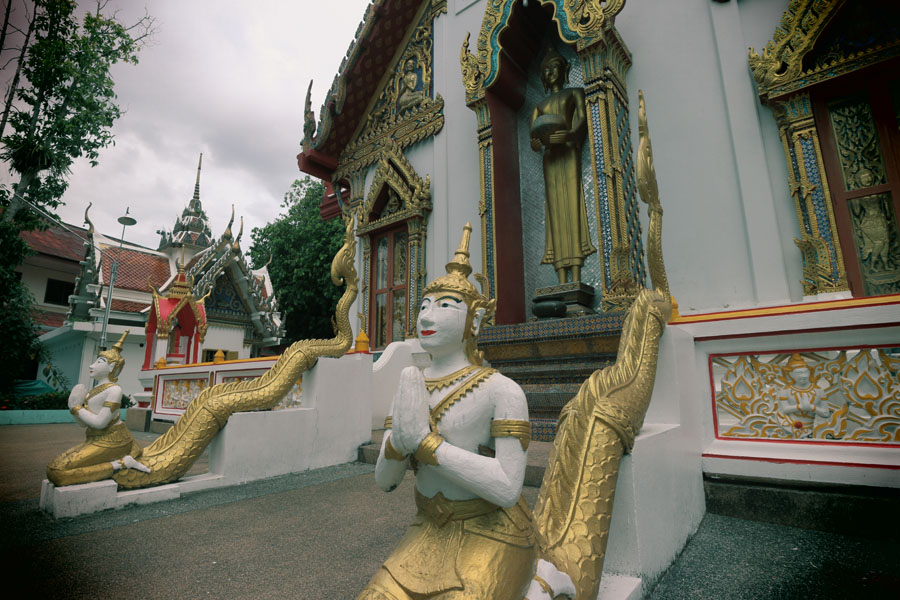
Canon EOS M Toy Camera Effect Creative Filter
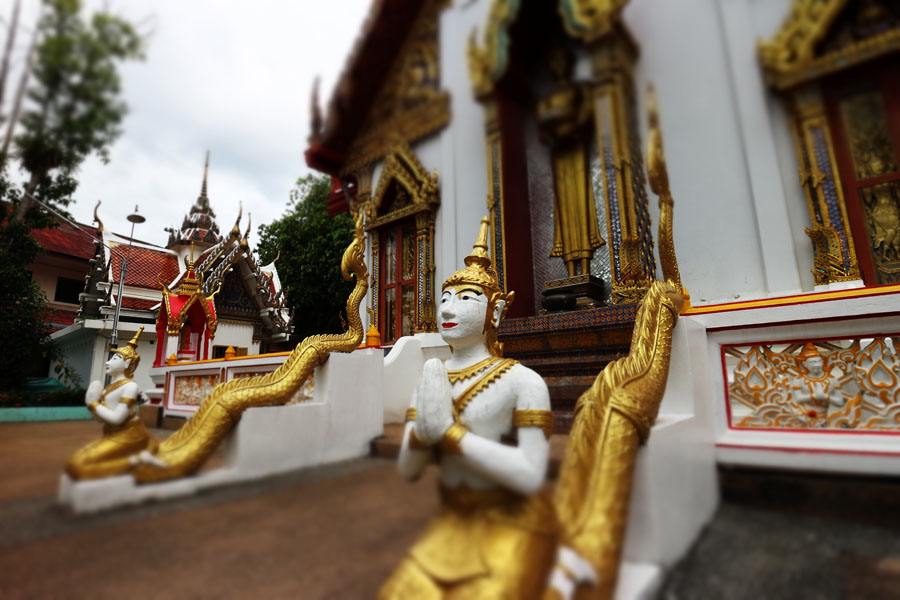
Canon EOS M Miniature Effect Creative Filter
Picture Styles
Picture Styles, which have been a feature of Canon digital cameras for a long time, are still there. You can select from Auto, Standard, Portrait, Landscape, Neutral, Faithful, Monochrome. Each setting uses a different combination of Color Tone, Saturation, Contrast and Sharpness.
You can opt for the default settings or customise them yourself. My personal preference is to very little in-camera and to make changes in post-processing.
Flash
 The little built-in flash in my S90 was very convenient for some fill flash or night time portraits, but the results weren't that pleasing. The EOS M has no built-in flash. Instead there is a dedicated external flash, with the designation Canon 90EX. This was included in the kit I bought, but it can be purchased separately.
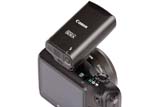 The EOS M, unlike a regular P&S camera, has a hotshoe and can accept any external flash, even if such a small body isn't going to be very manageable with a huge flash sitting on top. It also works perfectly with the Canon ST-E2 Speedlite Transmitter, although the little 90EX can be used as a Master to trigger off-camera Speedlites wirelessly.
If you are planning to use a brand of flash other than Canon, check that it is compatible first.
The camera can take advantage of all the features of EX series Canon Speedlites. The 90EX weighs almost nothing and takes two AAA batteries. Unlike my other Speedlites, it has just one control - an on/off button.
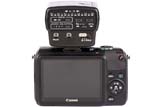 The limited testing that I have done looks good so far. Using the 90EX flash, it renders a very natural fill flash if the subject is in front of a bright background and the camera exposes the background well without me having to mess around with any exposure or flash exposure compensation.
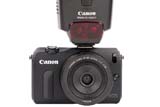 The 430EX II Speedlite appears to work fine with the EOS M, but I haven't tested every function and every possible permutation. There are certainly no problems with the basic operation.
A big flash on a small camera feels strange and the camera isn't well balanced. I don't plan to use big Speedlites or 400mm lenses a lot with the EOS M, but I like the fact that you can use them if you want to.
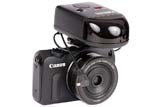 The EOS M lacks a PC sync socket for a PC sync cord. The studio lighting I use is triggered using either a direct PC sync cord or an infra-red transmitter. The IR transmitter physically attaches to the camera's hotshoe, but syncs from the PC sync socket.
I don't believe Canon's 6D full frame SLR has a PC sync socket, either. Presumably with all the radio triggers being used these days, it is old and redundant technology. However, some people will still have a need.
When using the 90EX on the EOS M to trigger my studio lights I have to put the flash in manual mode. The pre-flash that fires with ETTL causes the studio lights to fire before the shutter has opened.
Summary
 I liked the look of the EOS M when it was first announced, but waited a long time before buying into this new system. There were different reasons for this.
I had already decided that I would only have two camera systems - a small S90 sized camera that I could carry around conveniently all the time and a bulky DSLR system for when image quality and flexibility mattered.
I wasn't sure if the EOS M was one thing or the other and I didn't want an in-between camera. It won't rival a DSLR in many respects and it certainly isn't as portable as an S90. However, it isn't too bad to carry around in an appropriate case and the improved image quality over a P&S camera is certainly worth any extra inconvenience.
In its smallest configuration with just the EF-M 22mm f/2 STM lens and no flash it is quite portable, yet it is extremely flexible with the adapter that enables the camera to accept any EF or EF-S lens. This is a fantastic advantage over similar cameras from other manufacturers for people who have invested in Canon lenses.
At the time of writing this the EOS M is still a fairly new toy and I am looking forward to playing around a lot more. I am also eagerly anticipating the Canon EF-M 11-22mm f/4-5.6 IS STM lens. In a small package, this lens should have better optics than the EF-S 10-22mm f/3.5-4.5, which is getting long in the tooth now, and hopefully the AF should be better. The Image Stabilisation will also be very welcome.
I believe it's a great system with a lot of potential. The kit I bought had come down in price a lot and was something of a bargain. If you price the components separately, the body was very cheap.
Canon will eventually release an updated body, which will be an improvement over the current body, and I am happy to invest in Canon EF-M Lenses.
My other reason for holding back was for foolishly believing too much nonsense that I read on the Internet. You would think that this is a lesson I should already have learned.
Update: After using the EOS M system for a few weeks and looking at the images it produces I am currently reassessing all my ideas and needs regarding camera equipment.
It is small enough to carry everywhere, in the same way that my S90 was small enough to carry everwhere. The old adage that the best camera is the one you have with you is very true.
However, there are some major advantages over the S90. The obvious one is the image quality, which is excellent. In some situations the S90 image quality was very acceptable, but it was often lacking.
The EF-M lenses are excellent and very small and light. The ability to be able to use any EF or EF-S lens on the camera is another big advantage.
The battery life is awful. My local preferred camera shop didn't have any extra batteries in stock and therefore I had to order one. When I went to the shop to collect it, my only real interest was whether the EF-M 11-22mm had arrived yet.
There was none of my usual EF lens lust or wondering whether this was the right time to buy a 5D III. These are fabulous products, but whenever I look at them I just think about the weight on my back and know that they will spend most of their time indoors.
My EF 400mm f/5.6L lens gets used very rarely. The obvious subject is birds and although I enjoy an occasional outing in the countryside snapping birds, I'm not a bird photographer.
I don't shoot sports, I don't shoot athletes sprinting towards me, and I don't really shoot any fast moving objects. To be honest, I have no real need for long lenses longer than 200mm or advanced autofocus systems.
I didn't think this when I first bought the EOS M, but now I am considering selling my DSLR equipment. After the EF-M 11-22mm ultra wide angle lens, all I will really need is a good quality EF-M telephoto zoom up to about 200mm. I hope that Canon has one in the pipeline.
As new EOS M bodies are released they will be faster and will incorporate the latest technologies. I am holding back in the meantime until I am convinced that Canon will continue to invest in this system, but my gut feeling is that they will.
Other Review Pages You May Be Interested In


